BhumiTat - Re-engineering with innovations - How awesome it will be to run your own crypto trading platform [OpenDAX]
How awesome it will be to run your own crypto trading platform [OpenDAX]!! A fully functional crypto trading platform in 15 minutes, following simple steps.
Welcome, everyone! In this tutorial, we will deploy and start up a crypto trading platform from scratch using OpenDAX on Digital Ocean.
OpenDAX is an open-source cloud-native multi-service platform for building a Blockchain/FinTech exchange of digital assets, cryptocurrency and security tokens. The Crypto exchange software is developed at Openware.
So let’s get into it.

For Production setup, get extra-large VPS from Gavedu, which boasts
- A 10 core CPU
- 60 GB RAM
- 1.6 TB Intel Optane SSD
System Requirements: Considering Ubuntu 20.04
Login to your server via SSH and follow the steps bellow, it will collect all the requirements and setup your server for OpenDAX
- Create a file setup.sh and paste content bellow:
sudo nano ~/setup.sh
#!/bin/bash -xCOMPOSE_VERSION="1.23.2"COMPOSE_URL="https://github.com/docker/compose/releases/download/$COMPOSE_VERSION/docker-compose-$(uname -s)-$(uname -m)"# Opendax bootstrap scriptinstall_core() {sudo bash <<EOSapt-get updateapt-get install -y -q git tmux gnupg2 dirmngr dbus htop curl libmariadbclient-dev-compat build-essentialuseradd -m -G root appEOS}log_rotation() {sudo bash <<EOSmkdir -p /etc/dockerecho '{"log-driver": "json-file","log-opts": {"max-size": "10m","max-file": "10"}}' > /etc/docker/daemon.jsonEOS}# Docker installationinstall_docker() {curl -fsSL https://get.docker.com/ | bashsudo bash <<EOSusermod -a -G docker $USERcurl -L "$COMPOSE_URL" -o /usr/local/bin/docker-composechmod +x /usr/local/bin/docker-composeEOS}install_ruby() {sudo -u app bash <<EOSgpg2 --keyserver hkp://keys.gnupg.net --recv-keys 409B6B1796C275462A1703113804BB82D39DC0E3 7D2BAF1CF37B13E2069D6956105BD0E739499BDBcurl -sSL https://get.rvm.io | bash -s stableEOS}install_corelog_rotationinstall_dockerinstall_ruby.
Save the file and make it executable
chmod +x setup.sh
run the file
./setup.sh
Once the process it completed, your server is ready to go and we can clone OpenDAX
git clone https://github.com/openware/opendax.gitcd opendaxbundle install
Configure the installation and start it up
To configure the installation open the main configuration file config/app.yml and make necessary changes.
nano config/app.yml
# Configure domain and subdomainapp:name: "OpenDAX"domain: "gavedu.com"subdomain: "testdeploy"render_protect: false# Make sure to enable during deployment, SSL is managed by let's encryptssl:enabled: falseemail: "support@example.com"# These images are the stable ones, so better keep as it isimages:peatio: rubykube/peatio:2.3.43barong: rubykube/barong:2.3.36frontend: quay.io/openware/baseapp:2.3.20tower: quay.io/openware/tower-lite:2.3.130postmaster: quay.io/openware/postmaster:2.3.5arke_proxy:enabled: false# Used for local developmentvendor:frontend: git@github.com:openware/baseapp.gitvault:mode: developmenttoken: changeme# Storage configuration for storing KYC documentsstorage:provider: "Google"bucketName: "opendax-barong-docs-bucket"accessKey: "**********"secretKey: "**********"# Twilio configuration for phone verificationtwilio:phone_number: "+15005550000"account_sid: "changeme"auth_token: "changeme"# Recaptcha configuration, also can be disabled (none)recaptcha:type: "none"siteKey: "changeme"secretKey: "changeme"# Sendgrid configuration for email deliverysmtp:host: smtp.sendgrid.netport: 2525user: apikeypassword: changemesender_email: noreply@postmaster.comsender_name: Postmaster# Wallets configuration (DOESN'T NEED TO BE CHANGED)wallets:- kind: depositaddress: "changeme"max_balance: 0.0secret: changeme- kind: hotaddress: "changeme"max_balance: 100.0secret: changeme- kind: warmaddress: "changeme"max_balance: 1000.0secret: changeme# Terraform configuration for GCP deployment (DOESN'T NEED TO BE CHANGED)terraform:credentials: "~/safe/opendax.json"project: "example-opendax"region: "europe-west4"zone: "europe-west4-a"instance_name: "opendax-cloud"machine_type: "n1-standard-4"image: "debian-cloud/debian-9"
After all the configuration is in place, we’re ready to GO-Live!
It’s as easy as running a simple command:
rake service:all
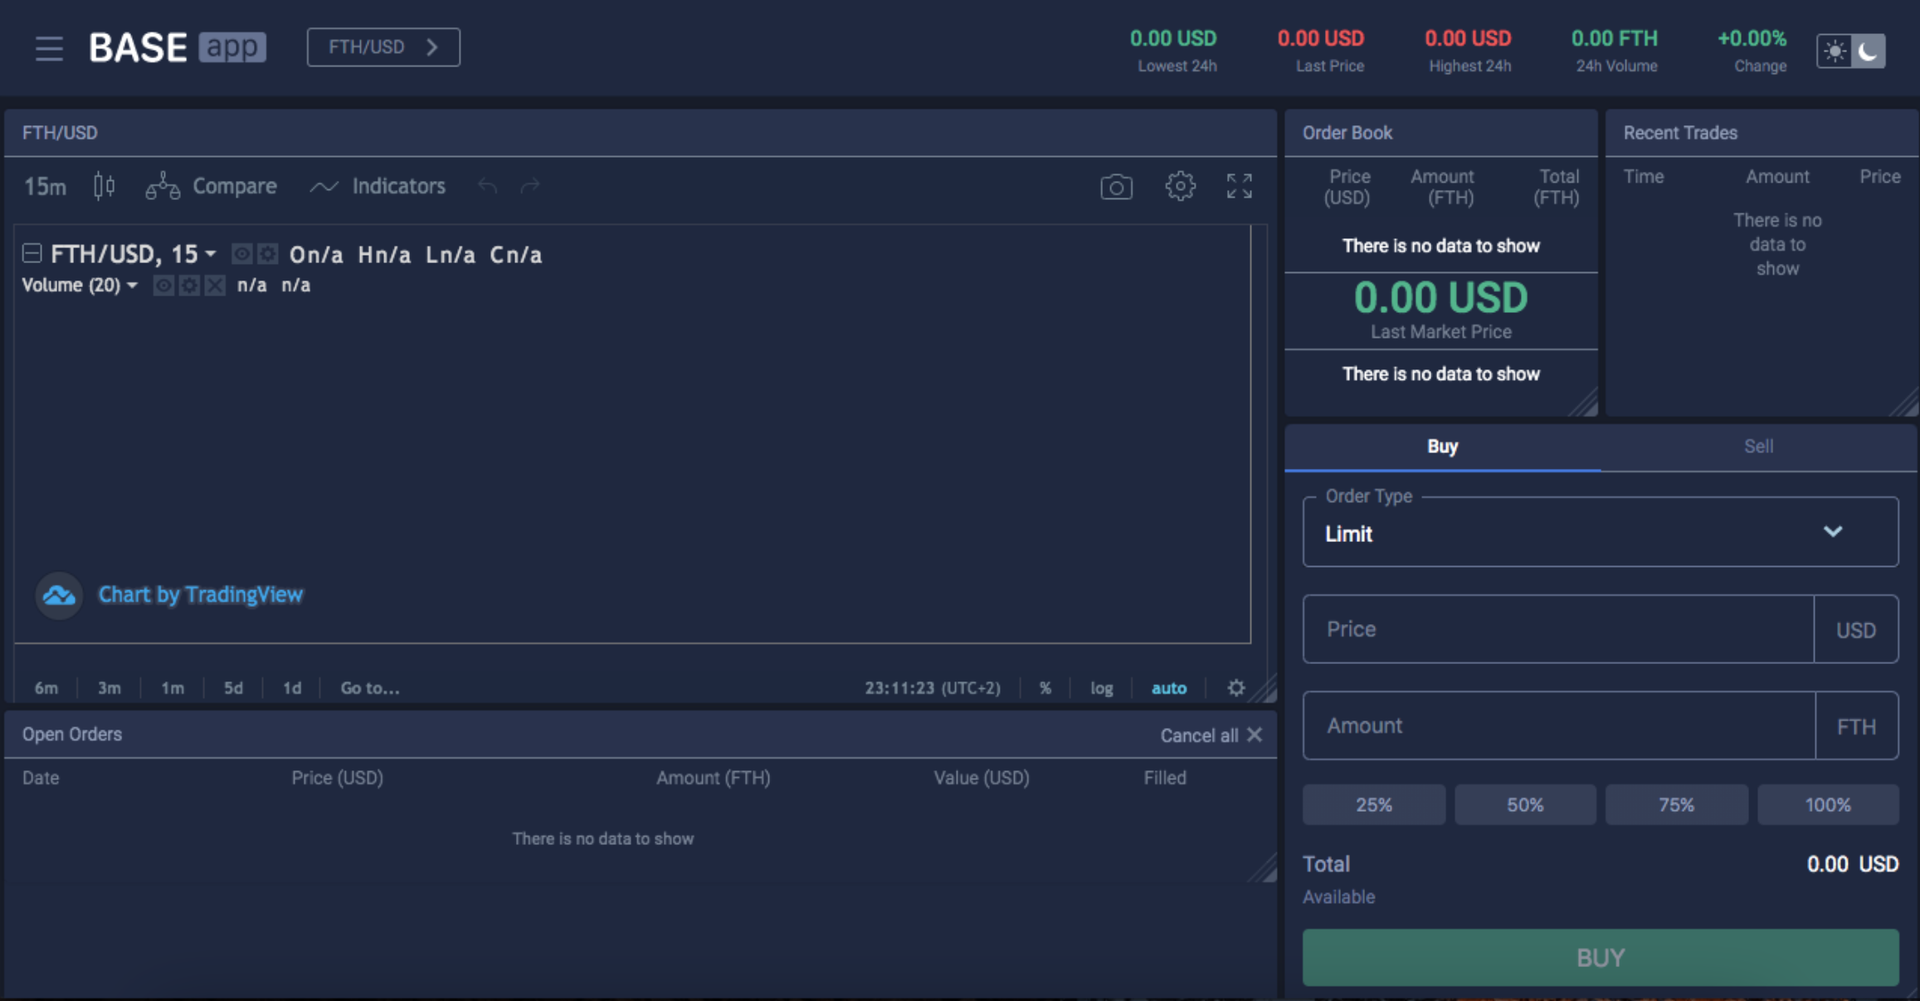
This command will take a while to execute since every image has to be pulled and started up, so be patient, once everything is up and running, you will be to access the exchange at http://testdeploy.gavedu.com it will look something like this

A fully functional crypto trading platform in 15 minutes, following simple steps. In the next tutorial, we’ll customize the frontend page with our own logo to make it more personal and make open source mobile application, https://github.com/colombo-77/OpenDAX
Stay tuned and leave your comments bellow.
Gopal
BhumiTat Technologies (OPC) Pvt. Ltd.
No comments yet. Login to start a new discussion Start a new discussion